Cushion
Creating a project via form in the schedule timeline
This weekend, I returned to focusing on the app of Cushion after spending the past couple weeks on the website. I sat down to figure out which part of the schedule timeline to tackle next and landed on project creation. Up until now, the schedule timeline beta has been read-only while I make progress on the visualizations and mechanics of the timeline. This has been great as it’s given me time to focus on these crucial parts of the timeline without being sidetracked by an incredibly complex aspect of it—project creation. But when I thought about what to tackle next, I realized that at this point, not being able to create a project is seriously limiting. There’s only so much you can do right now with a read-only timeline that only shows you a fraction of what it eventually will. Because of this, I decided it was time to take the leap into the next (less exciting) phase—creating a project via form.
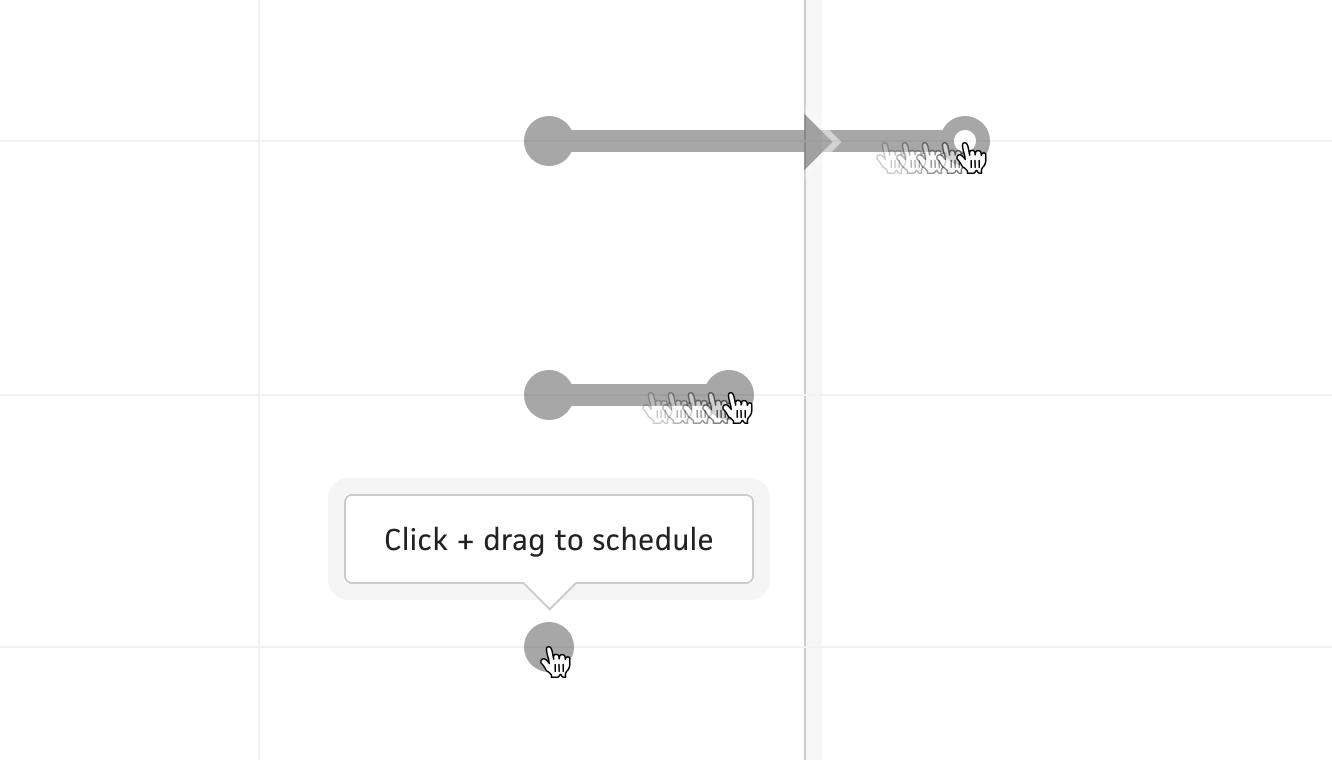
Initial concept for click & drag scheduling
With the schedule timeline, there will be two ways to create projects—via click & drag in the timeline and via form. The former is going to be super fun and hopefully a showstopper when it’s all finished, but it’s also the hairiest snowball you can imagine. As soon as I thought, “Okay, but once a user creates a project, how do they name it or edit it afterwords?” I knew I needed to start with the form.
Being able to create a project with a form will be 90% of the work needed for click & drag’s second step. As soon as someone confirms the click & drag of their project, Cushion can open the form for naming and fine-tuning. This initial form work will also be 95% of the work for editing a project. Getting the form out of the way early will let users create a project with the obvious, traditional, straightforward approach of clicking a button and filling out a form. From there, I can have fun and play around with the click & drag experience, knowing that users can at least create a project via form.
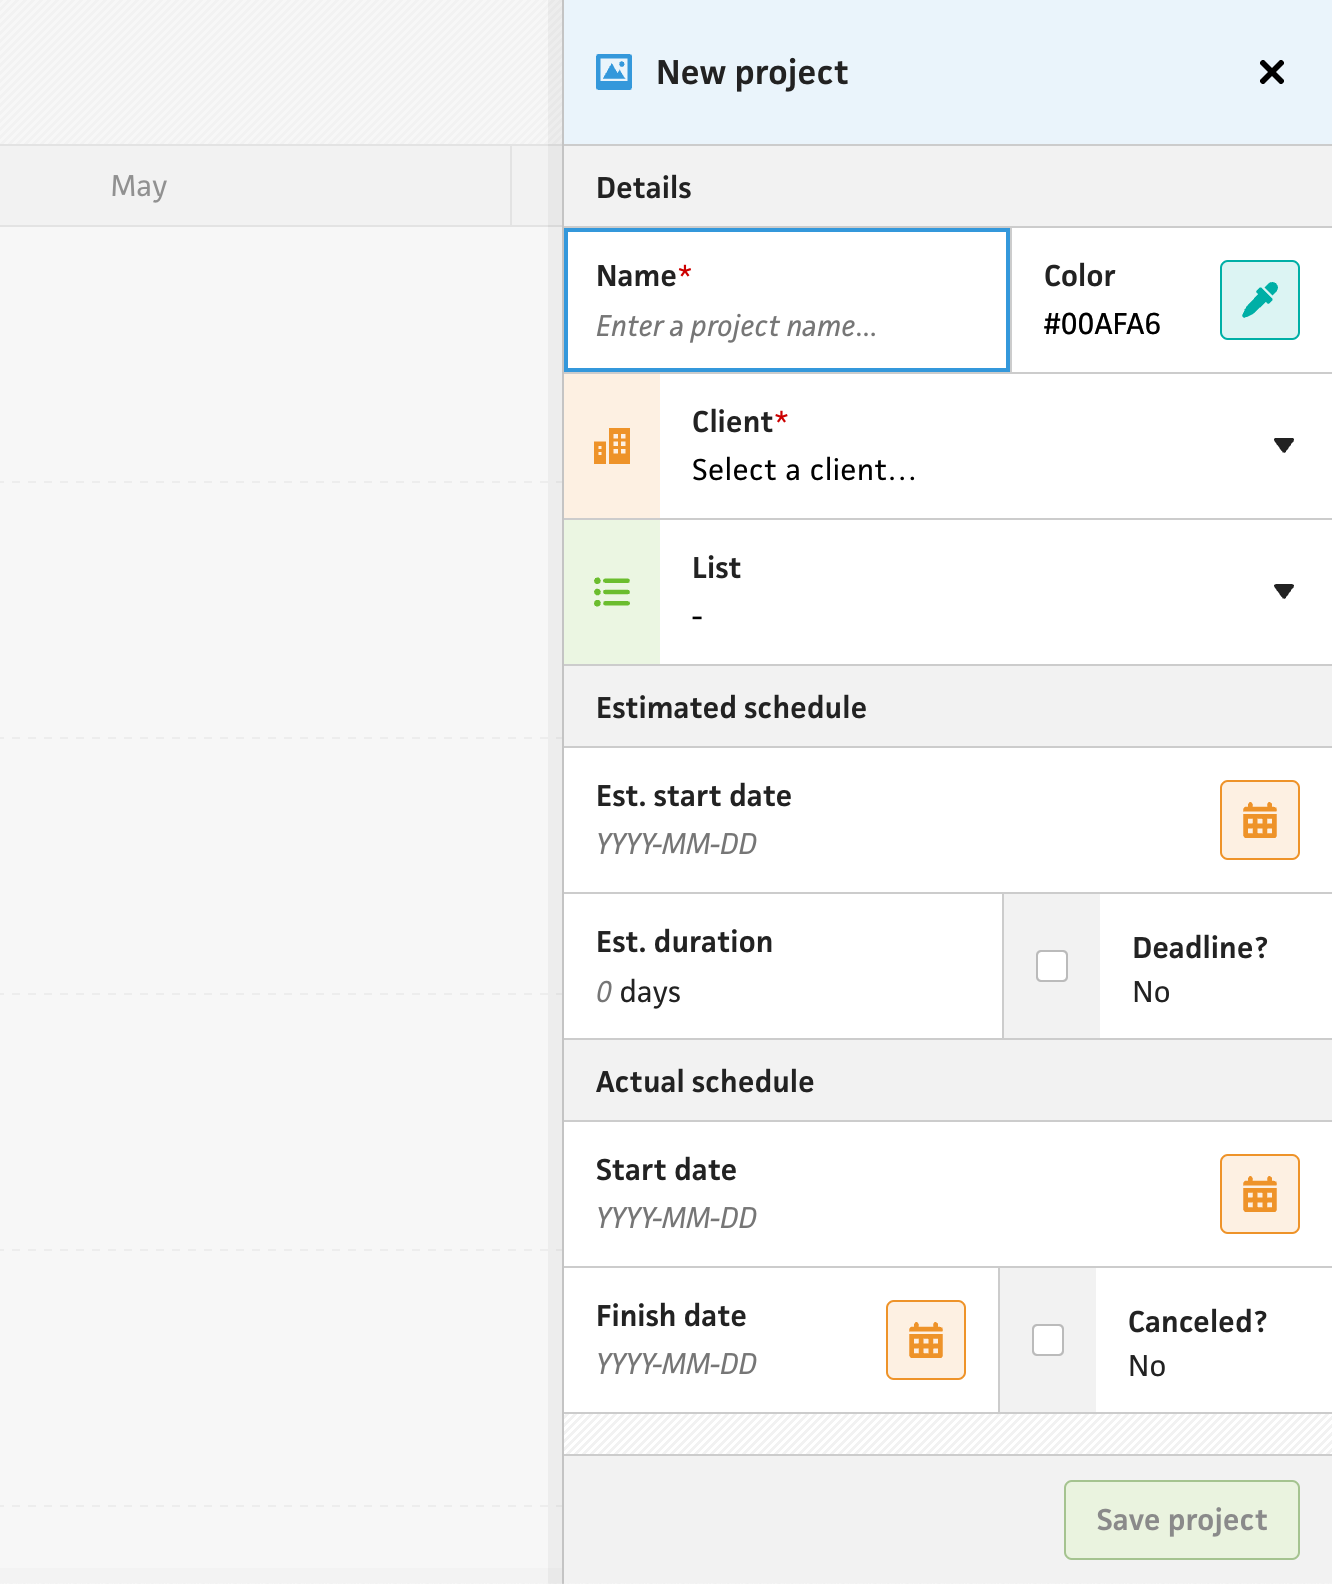
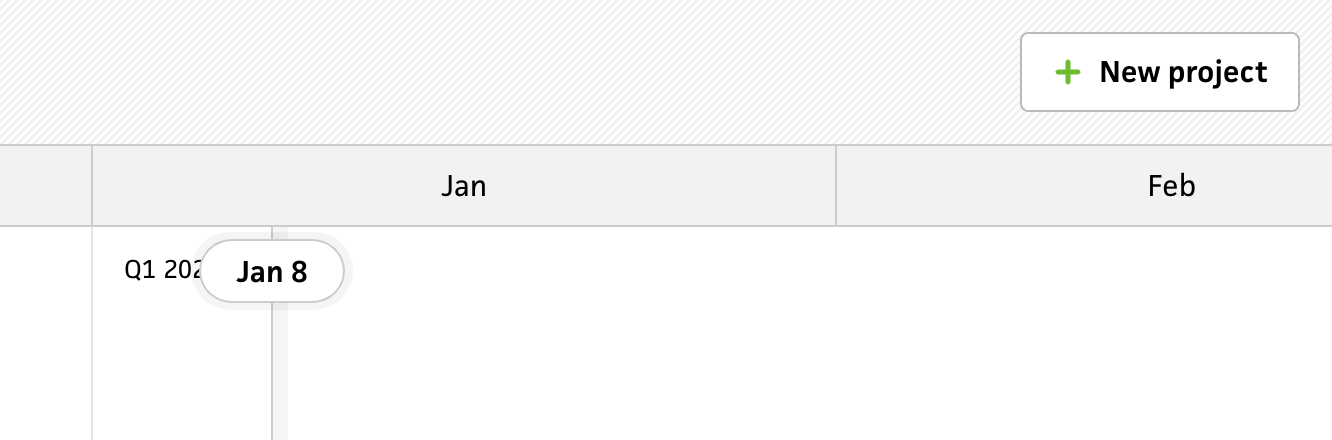
For the form itself, I’m relying on the stacked modal pattern that I designed early last year. This will slide out when creating a new project and let users fill out their project details inline. I’m starting with a schedule-focused set of fields because the project is being creating in the schedule section. The plan is to continue this type of context-based form and only show relevant fields, so it’s not too overwhelming every time you need to create a project. That said, I’m certain I’ll have folks wanting to see everything at once, so I’ll most likely end up with a button that shows the rest of the form.
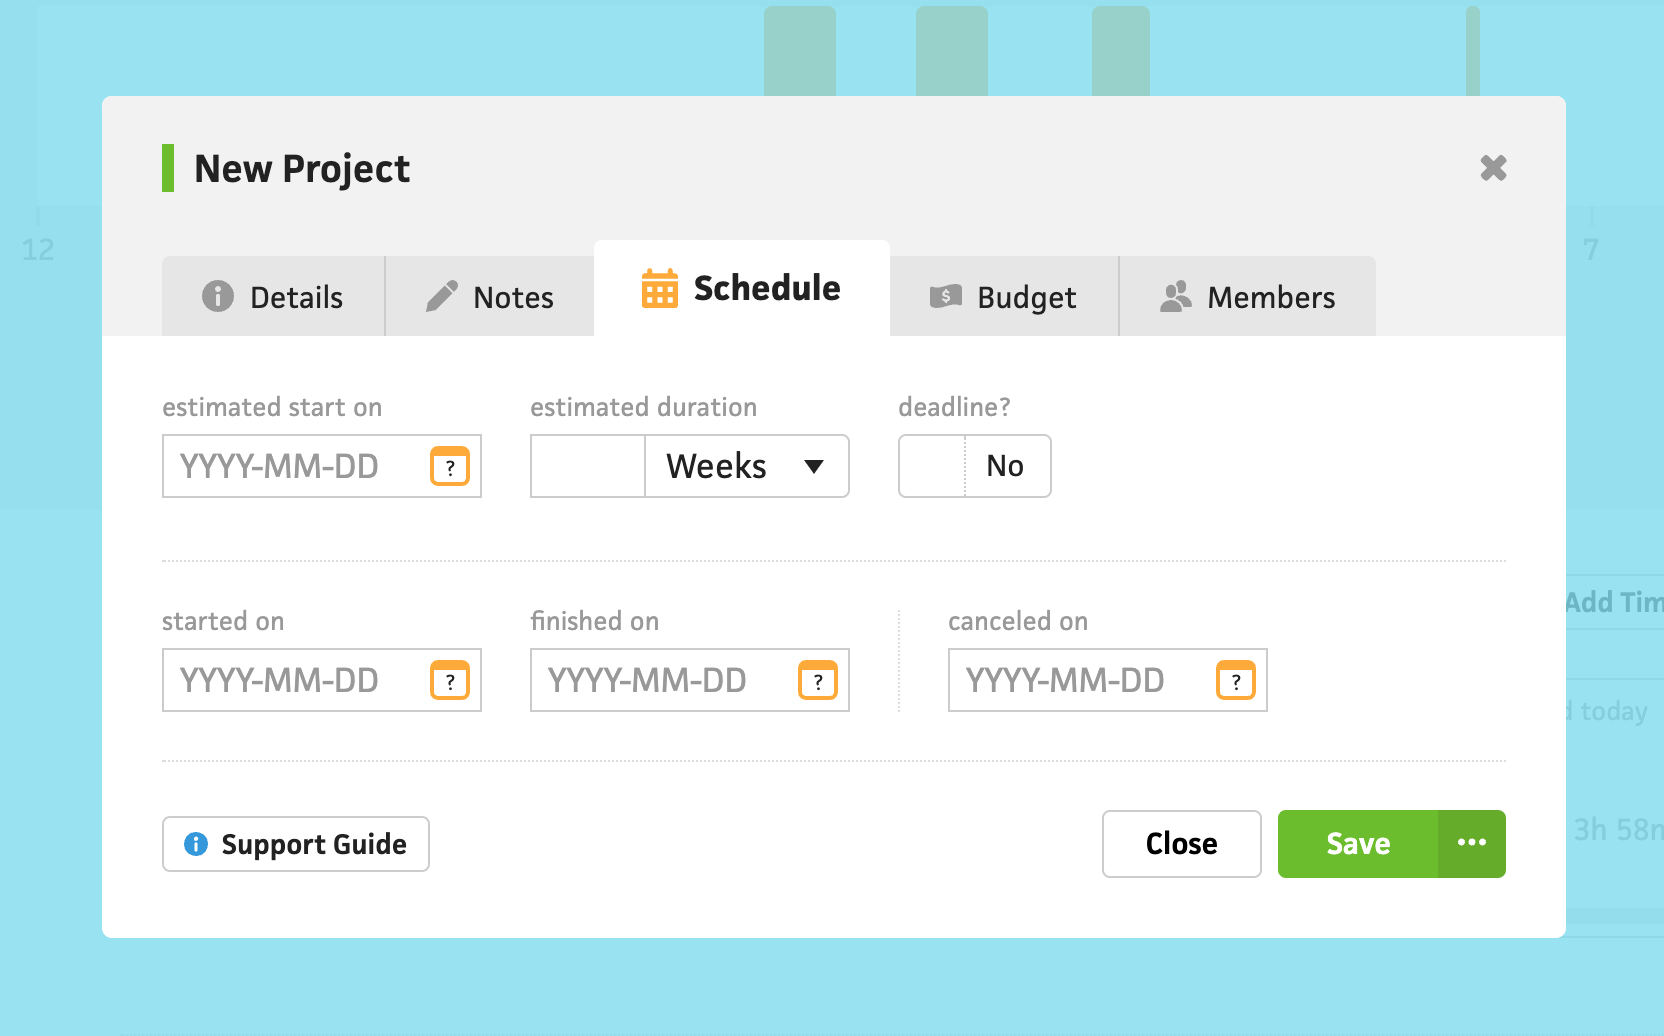
The current project form uses tabs to separate the various contexts that a project can have, and it also throws all the schedule fields into the same pile. I’ve always found this to be potentially confusing for users because they might see the “started on” field and not know how it differs from the “estimated start on” field. I’m certain folks get confused between the “finished on” field and the “estimated finish on” field because I frequently get support tickets asking why a project is marked as finished when they enter an estimated date in the “finished on” field. This is an obvious UX problem I need to fix.
To make the estimated schedule versus actual schedule clearer, I’m trying out an approach of separating the fields into two groups, labeled “Estimated schedule” and “Actual schedule”. I’m also labeling the fields in a more standalone style, like “Start date”, instead of being clever with a sentence-based structure of “Started on [date from the field]”. I’m hoping these changes lead users to see “Estimated schedule” as a “Step 1”, then see “Actual schedule” and realize they can set those after-the-fact. Being able to specify these via click & drag in the timeline is going to be especially tricky, but I’m not going to let myself get overwhelmed by that yet.
In Cushion, you can specify the estimated duration of a project, which will calculate the estimated finish date based on the estimated start date. If you have a hard deadline, however, Cushion lets you set an estimated finish date directly instead of using the estimated duration. To switch between these two options, I include a checkbox that users can toggle.
At first, I simply swapped out the fields with a regular conditional, but then I realized it would be much more effective to transition between the fields—visually showing that they’re swapping. For this, I used a simple transform: rotateX transition for both fields, so they flip as if they represent the front and back of this field.
The flip transition is a nice touch, but I went a step further with the data itself. If you set an estimated duration, then toggle the deadline checkbox, Cushion will calculate the estimated finish date and insert it into the field. Conversely, if you specify a date then toggle, Cushion will calculate the estimated duration based on the date.
In the “Actual schedule” section, I need to include a field toggle as well—for the “Finish date” and “Canceled date” fields. A project can finish on a specific date, but if it gets killed halfway through or even before the project starts, users can set the canceled date. A project, however, can’t be both finished and canceled, so it needs a toggle. Since we’re toggling between two dates here, we can visually maintain the dates between them, but under the hood, we’re nullifying the opposite date, so it’s correctly passed to the backend.
This is where I currently am right now, but still on my to-do list is adding intervals (like “weeks”, “months”, etc.) to the DateDurationInputField, and scrolling to the project after creating it. Then, I’ll probably tackle editing a project via the form, and finally get to the fun part—click & drag. This progress feels great, though. It’s a really nice feeling to see all of my ideas about scheduling start to come together!